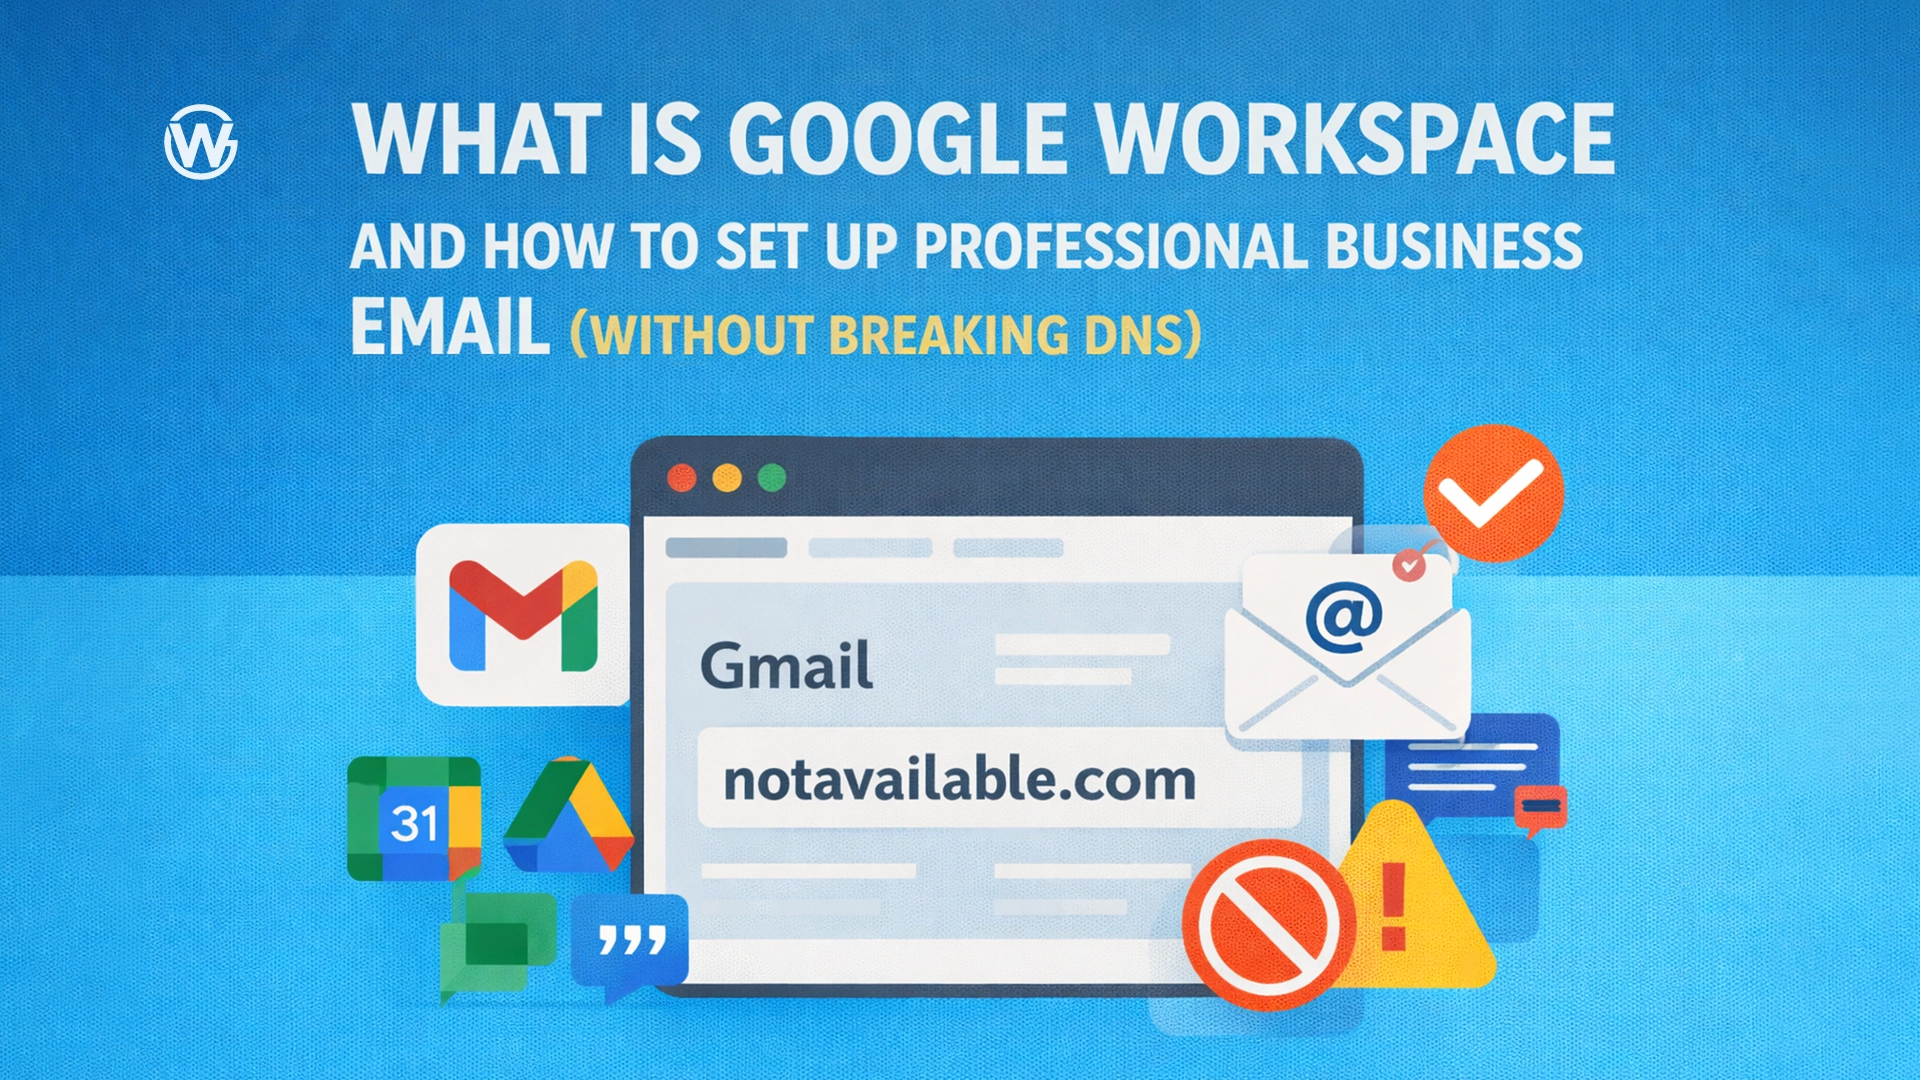
Professional email makes your business look established, but setting it up the wrong way can break your website or stop emails from working.
What’s the problem?
After buying a domain and setting up hosting, most business owners want a proper email address like hello@yourbusiness.co.uk. This is where things often go wrong. Email setup requires DNS changes, and many people are scared of touching DNS because they’ve heard it can break their website or existing email.
The good news is it can be done safely if you follow the right steps.
Why this hurts your business
- You’re using a personal Gmail address for business
- Emails stop working after setup
- Your website or contact forms break
Quick fix you can do today
This shows you how to set up professional email the safe way.
Step 1: Understand what Google Workspace is
Google Workspace gives you professional email using your own domain.
You get:
- Email like hello@yourbusiness.co.uk
- Gmail-style inbox
- Calendar, Drive, Docs, and Meet
It does not replace your hosting or website.
It only handles email and Google tools.
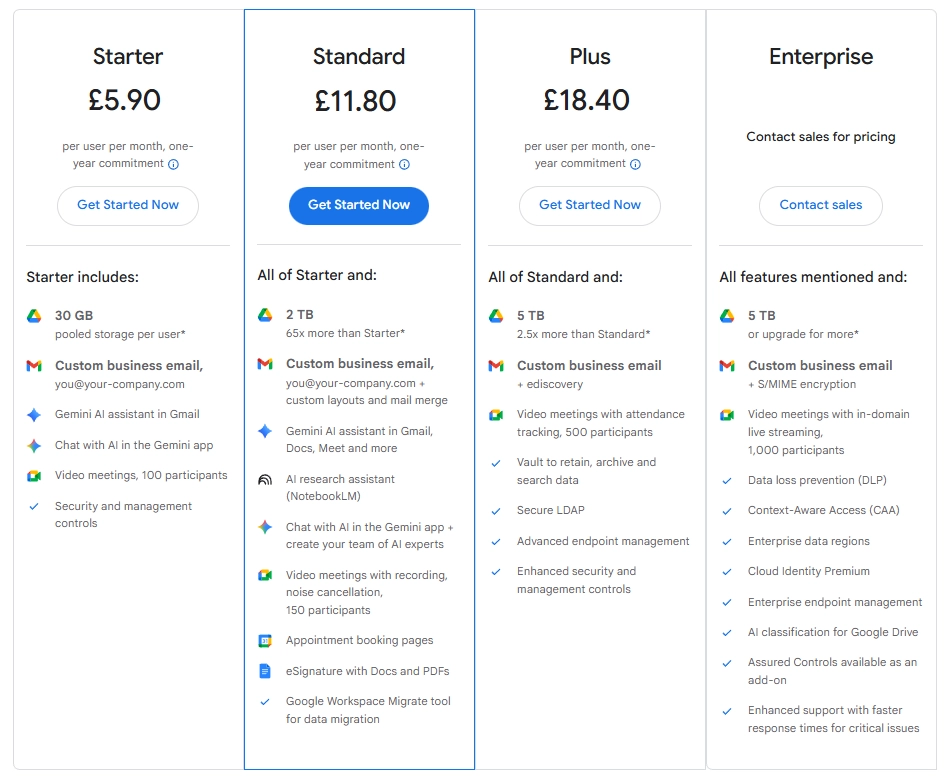
Step 2: Buy Google Workspace
- Go to Google Workspace
- Choose a basic business plan
- Pricing usually starts around £6–£12 per user per month
- Use the domain you already own
You don’t need to cancel anything you already have.
Step 3: Verify your domain ownership
Google needs to check you own the domain.
This is done using DNS, safely. You add a TXT record that works like a simple proof of ownership note for Google. It does not change your website content or take your site offline.
Google will give you:
- One TXT record
- A value to copy (and sometimes a Host or Name)
In your domain provider (e.g. Namecheap):
- Go to DNS settings
- Add the TXT record
- Paste the value from Google
- Save changes
This does not affect your website.

If you are using NameServers, as shown in the screenshot above, DNS may be managed in your hosting provider instead of your domain registrar. For example, if your NameServers are set to Hostinger, you must add the TXT record in Hostinger DNS or the Zone Editor, not in Namecheap.
→ Click here to learn more about hosting and how it works
Step 4: Add email DNS records (MX records)
This is the most important step.
MX records tell the internet where emails should go. This means when someone emails you@yourdomain.com, these records tell email providers to deliver your mail to Google Workspace.

Google will provide:
- A list of MX records
- Priority numbers
- The correct mail server values for Google
In your domain DNS (as shown in the screenshot above, for example in Hostinger if your NameServers point there):
- Add each MX record exactly as shown
- Use the correct priorities and values for Google Workspace
- Set TTL to 3600 seconds (1 hour) for each record
- Remove old email MX records if prompted
- Save changes
Your website stays untouched.
Step 5: Protect your email from spam issues
These records help emails land in inboxes, not spam. They also help stop people sending fake emails that look like they come from your domain.
You may be asked to add:
- SPF record
- DKIM record
- DMARC record
They do not affect your website or hosting.

SPF record
SPF allows Google Workspace to send email for your domain.
Add a TXT record:
- Type: TXT
- Name or Host: @
- Value: v=spf1 include:_spf.google.com ~all
- TTL: 3600
DKIM record
DKIM adds a signature to emails sent from Google, helping delivery and trust.
Open Google Admin, then go to Apps → Google Workspace → Gmail → Authenticate email (DKIM), select your domain, choose Generate new record, then copy the TXT record Name or Host and Value that Google provides.
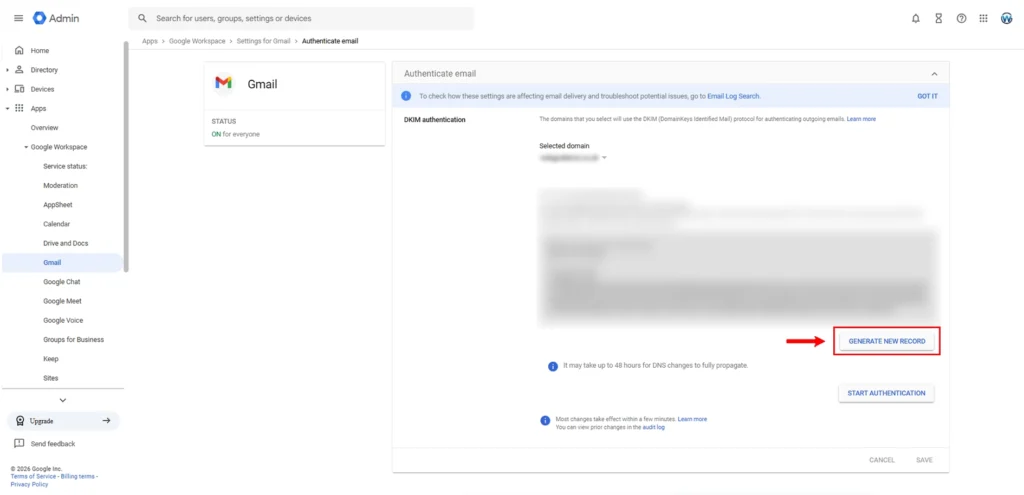
Add a TXT record (from Google):
- Type: TXT
- Name or Host: google._domainkey
- Value: copy from Google Workspace
- TTL: 3600
Then go back to Google Workspace and click Start authentication.
DMARC record
DMARC tells email providers what to do if an email fails SPF and DKIM checks. This reduces spoofing.
If you do not want daily DMARC reports, do not add any rua or ruf tags.
Add a TXT record:
- Type: TXT
- Name or Host: _dmarc
- Value: v=DMARC1; p=none
- TTL: 3600

Step 6: Log in and start using your new email
Once DNS updates are complete you can then do the following:
- Go to gmail.com
- Log in using your new email address
- Start sending and receiving emails
DNS changes usually work within minutes,
but can take up to 24 hours.
Why Google Workspace works well for businesses
Many email providers exist, but Google Workspace is popular because:
- Familiar Gmail interface
- Strong spam protection
- Reliable delivery
- Easy access sharing
It works well alongside your website and hosting.
Tool we recommend
Google Workspace
Google Workspace gives you professional email without touching your website hosting and is trusted by millions of businesses worldwide.
Affiliate link:
Click here to get started
Need help setting this up safely?
If DNS changes feel stressful or you want this set up without risk, message us and we’ll handle it properly for you.
This also allows us to help later with:
- Delegated access
- Security
- Google tools setup