Sooner or later, you’ll need to give someone access to your accounts, and how you do this matters more than most people realise.
What’s the problem?
When working with developers, marketers, or agencies, access is often needed quickly. Many business owners share passwords because it feels like the fastest option. Unfortunately, this removes all control, creates security risks, and often leads to being locked out of accounts later.
Every major platform already has a safer way to do this. You just need to know where to click.
Why this hurts your business
- One password gives full control of your account
- You can’t see what was changed or by who
- Removing access later becomes messy or impossible
Quick fix you can do today
Never share passwords.
Always give access using permissions.
Step 1: Understand permission-based access
Permission-based access means:
- You invite someone using their email
- They use their own login
- You control what they can see or change
- You can remove access instantly
This keeps you in control at all times.
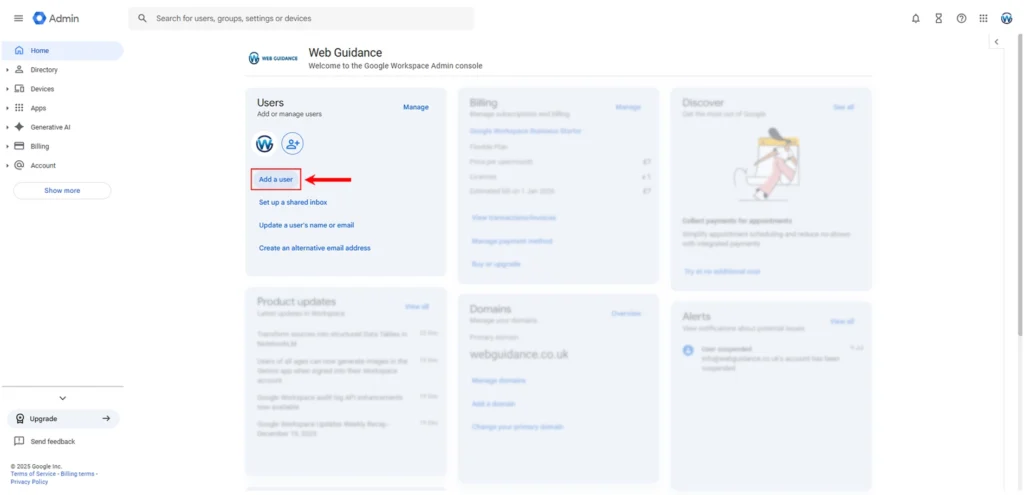
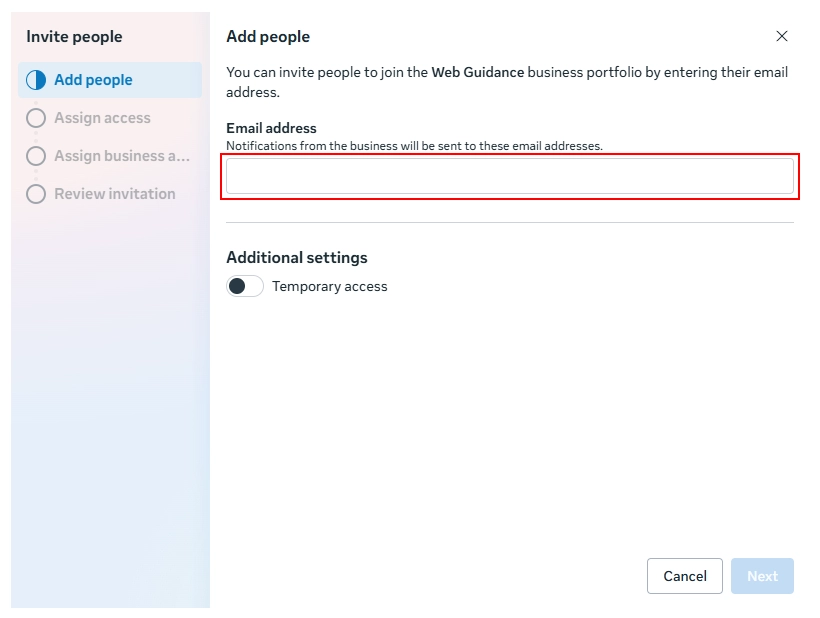
Step 2: Give access to Google Workspace (Gmail, Drive, Admin)
This is the recommended business method because you don’t share passwords and the owner can remove access instantly.
Important: In Google Workspace, you generally pay per user (per “seat”), so adding a new user typically increases the monthly cost.
- Sign in to admin.google.com
- Go to Directory → Users
- Click Add new user
- Create a user for your developer (e.g.
name@yourdomain.com) - The developer gets their own login. You keep full control.
If admin access is needed (only if required):
- In Admin console, go to Account → Admin roles
- Assign the minimum role needed (avoid Super Admin unless absolutely necessary).
If they need access to your inbox (optional):
Use Gmail delegation (no password sharing), but the delegate must be a user inside your organisation.
How to remove access:
- Remove the admin role, or suspend/delete the developer user.
Why businesses use this method: separate logins, permission control, auditability, easy revocation.
Google Workspace helps you run your business from one professional email, with simple tools to manage your team, access, and day-to-day work online.
→ Click here to learn more about how Google Workspace works and how to get started
Step 3: Share your password (free, only with a trusted person)
This method is not recommended because it gives full access to your Google account. Only use it with a trusted person.
Before you share access
- Turn on 2-Step Verification: https://myaccount.google.com/security
After setup is complete (remove access)
- Change your password: https://myaccount.google.com/security
- Go to Manage Google Account
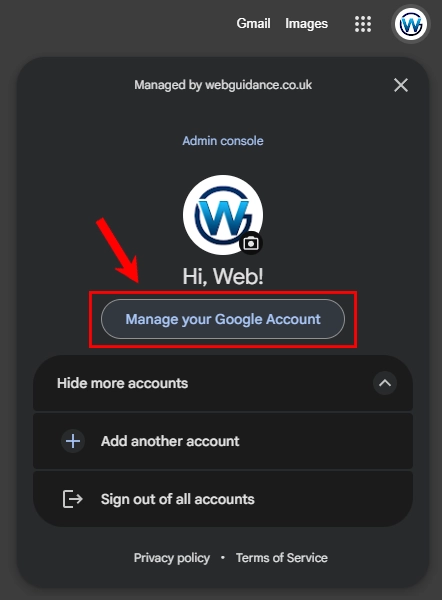
- Click Security and sign in
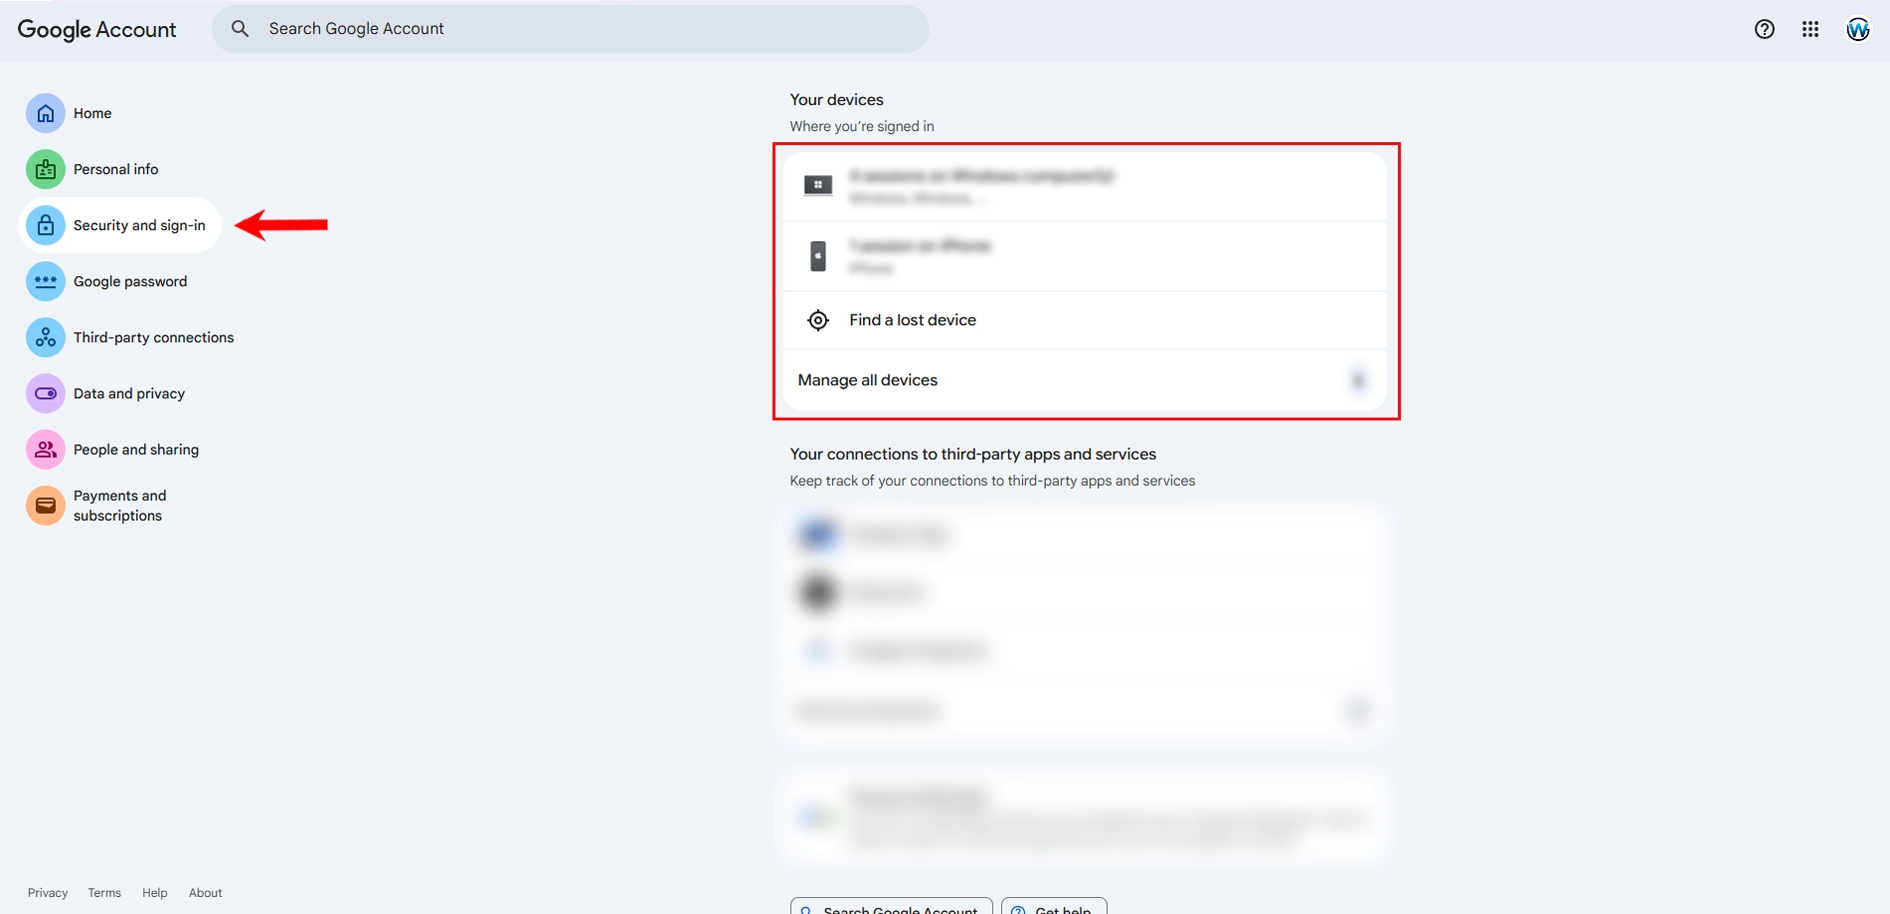
- Scroll to Your devices, then Manage your devices, then sign out of any devices you do not recognise
https://myaccount.google.com/device-activity - Run Security Checkup
https://myaccount.google.com/security-checkup
If you do not want to share your password
Use screen sharing instead. It is free and safer.
Microsoft Teams
Google Meet
Zoom
Step 4: Give access to Facebook and Instagram (Meta Business Suite)
Never use personal Facebook logins.
Correct setup:
- Go to Meta Business Manager
- Open Business Settings
- Go to People
- Click Add
- Enter their work email

Choose:
- Employee access for staff
- Partner access for agencies
Assign only what they need:
- Pages
- Ad accounts
- Instagram accounts
You can remove access in seconds.
Step 5: Hosting access (same principle)
Hosting providers work the same way.
- Add users instead of sharing logins
- Limit access to what’s needed
- Remove access when work ends
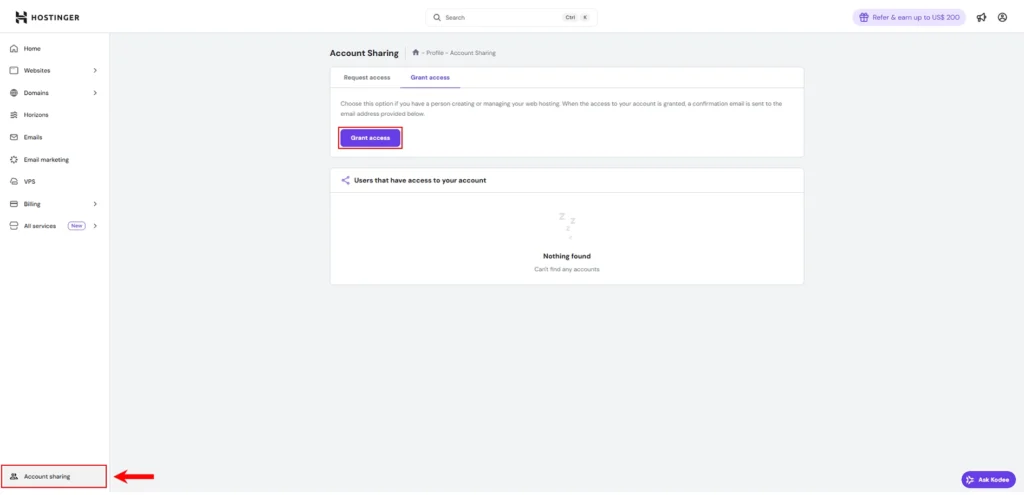
This applies to Hostinger, but works very similar with other hosting providers like FastHosts, and others.
→ Click here to learn more about Hostinger and how hosting works
Step 6: The universal security rule
Remember this rule:
If a platform doesn’t support permissions, don’t use it for business.
Always:
- Use role-based access
- Review access every few months
- Remove old users
This avoids long-term security issues.
Step 7: When access should always be removed
People often forget this step.
Remove access when:
- A project finishes
- A freelancer stops working with you
- An employee leaves
- An agency relationship ends
This keeps your accounts secure.
How Web Guidance works with access
We always:
- Use official access systems
- Request only what’s needed
- Keep access limited and auditable
You stay in control at all times.
Need help setting this up safely?
If you’re unsure how to give access or want this set up properly, message us and we’ll guide you through it or handle it securely for you.
This applies whether:
- We manage your setup
- Or you follow this guide yourself